
Building your own careers site with AI: what you need
Want to build a careers site without an agency? With an AI assistant and Exenzo Sites you can. The checklist, the build step by step, and what stays your job.

You want a careers site, but not a three-month project with an agency. You'd rather build it yourself, or at least stay in charge. These days you can, with an AI assistant: you say what you want, the assistant builds the pages, and you decide what goes live.
Below is the checklist first: what to have ready before you start. Then how the build works step by step, and what you keep doing yourself. The screenshots come from an example site we built this way.
The checklist: what you need
Once you have these three things, you can start.
1. Your jobs
- Are your jobs in an ATS? Connect it and they come in by themselves, including new and closed ones.
- No ATS? Add them yourself in Exenzo, or let the assistant do it.
- For each job: salary, hours, location and a closing date. That's what candidates search on, and what Google for Jobs wants to see.
- For each job, a contact person with name, photo and phone number.
2. Your style
- Your logo, ideally as an SVG or a PNG with a transparent background.
- Your colours as colour codes (#2F6B4F, not "green").
- Your fonts, or an example of a site whose style you like.
- Your tone: how do you talk to candidates? A few sentences from a job ad you like say more than "warm and human".
- The facts about working for you: locations with addresses, how the rota works, what you pay towards training, what's in the collective agreement.
3. Your images and recruitment material
- Photos of your people, your locations and the work itself. Your own photos work better than stock.
- A few quotes from real employees, with their permission.
- Whatever you already have: a recruitment video, a brochure, a job ad that worked well.
- No photos yet? You can have them generated. If you do, say so honestly on the site.
And on top of that:
- An Exenzo Sites environment. A free trial environment is enough to get started.
- An AI assistant, such as Claude or ChatGPT, connected to your site.
- A few hours to review things yourself. More on that below.
Why building it yourself works now
For a long time you had to choose between a website builder where you drag everything around by hand and which knows nothing about jobs, or an agency that does it well but is expensive and slow.
An AI assistant now does the manual work: setting up pages, writing copy, putting blocks in the right place. You explain how things work at your organisation and choose what goes live.
Why use Exenzo Sites instead of building from scratch
An AI assistant can also write a careers site from scratch in code. After an afternoon it looks good. But a careers site collects personal data, jobs change every week and Google has to find them. You don't build that in an afternoon, and you have to maintain it afterwards.
On Exenzo Sites the assistant only builds the pages. This is already there:
GDPR and applications
- Applications and CVs are stored securely, not in a folder anyone can open.
- You set a retention period, after which applications are deleted.
- A cookie banner, a privacy statement and a cookie page that keeps track of which cookies are running.
- Spam protection on the application form, without making candidates click on pictures.
Hosting
- Hosting, SSL certificate and your own domain are taken care of. There's no server for you to maintain.
- Your site and applications are hosted in the EU, in a Frankfurt data centre, with automatic backups.
- Pages load fast, even while a campaign is running.
- When you work on something new, it waits as a draft. Visitors only see it once you publish.
Visibility in Google and AI assistants
- Every job gets the structured data Google for Jobs needs: salary, location, hours, closing date.
- FAQs are sent along as structured data too, so search engines and AI assistants can use the answers directly.
- A sitemap and robots.txt that update themselves. Closed jobs drop out automatically.
- Multiple languages, with the right language tags for Google.
- Not ready to be in Google yet? Turn indexing off with one tick box.
Integrations
- Your jobs come from your ATS and stay in sync. No ATS? We import them from your current site, or you add them yourself.
- Applications are passed on to your ATS or another system.
- Job feeds for job boards such as Indeed.
- Google Analytics and Tag Manager, which only load once a visitor gives consent.
Search and filters
- Candidates search by job title and filter on location, hours and salary. The filters come from your job data, so you don't have to build them.
If you build everything yourself, you're also handling privacy and search visibility after launch. On Exenzo Sites, you only look after the content.
Step 1: connect the assistant
Exenzo Sites has an MCP connection: a standard way for an assistant to read and edit your site. You create a token in your environment and choose what the assistant may do:
- read: view pages, jobs and content;
- write drafts: edit pages and content, but only as drafts;
- full: also publish and change the site structure.
Start with write drafts. Publishing is something you do yourself.
Step 2: give the design a direction
The more concrete your starting point, the less you have to correct later. A brand guide works, and so does an existing site. We started with a design from an AI design tool: one page with colours, fonts and the layout of the homepage.
 The starting point: one homepage design. The assistant built the rest of the site in the same style.
The assistant puts the colours, fonts and logo into the theme. It first asks for the list of available fonts, so the site doesn't end up with a font it can't load.
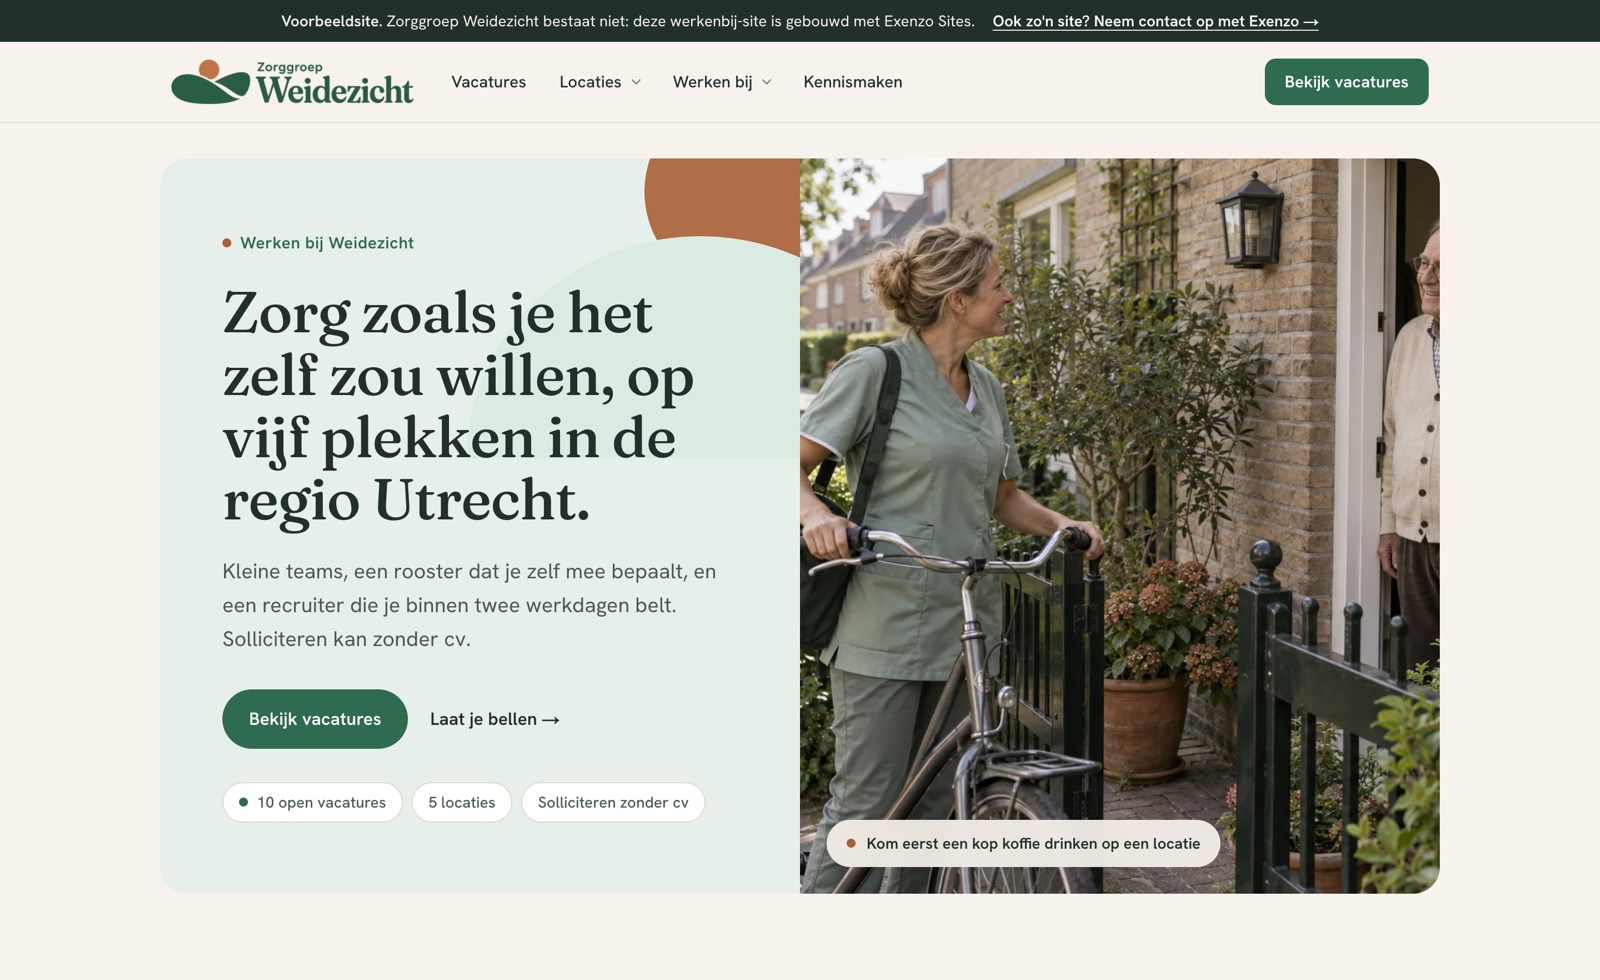 The result on the live site, with real jobs and our own photo.
Step 3: build the pages
Next come the menu and the pages: home, jobs, a page per location, meet the team, learning and development, FAQs. Every page is made of blocks, such as a hero, a job list, reasons to work there, a quote and a call to action. You say what you want, and the assistant picks the blocks and fills them in.
Step 4: record shared content once
This step saves you the most work later on. Locations, team members and FAQs aren't loose text on a page. They're content you enter once, and they then appear on every page where they belong.
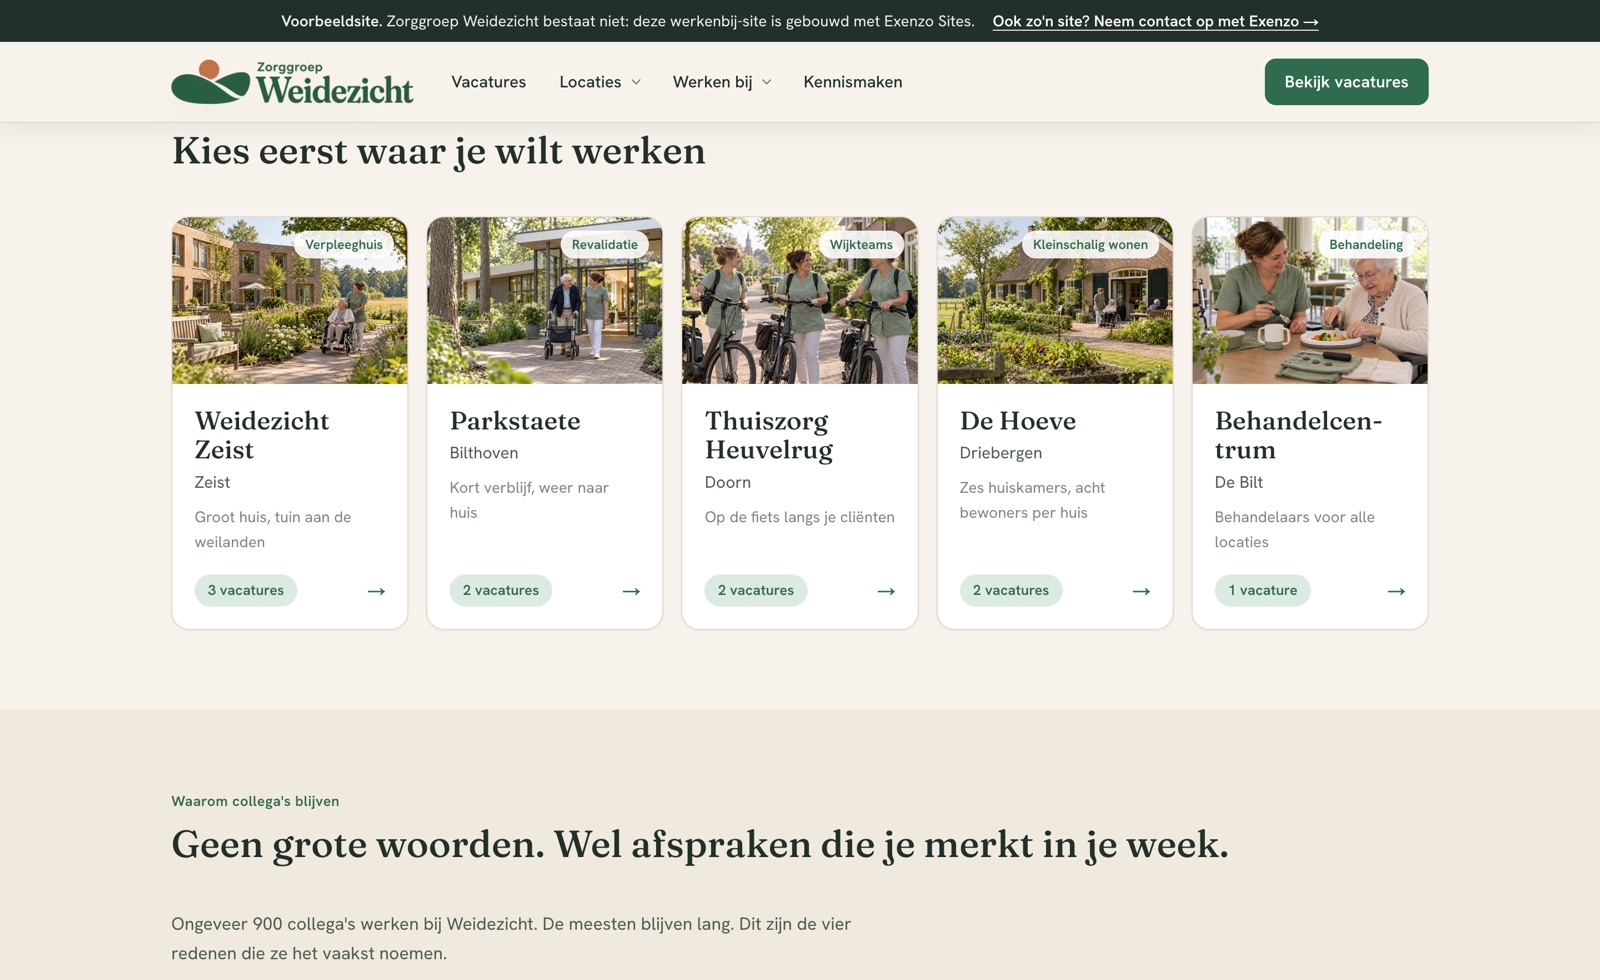 Each location is stored once in the content, with photo, address and number of open jobs.
A question about parking at one location shows up on that location's page and on the general FAQ page, from the same source. Change the answer and it's correct everywhere. Google gets the questions as structured data as well.
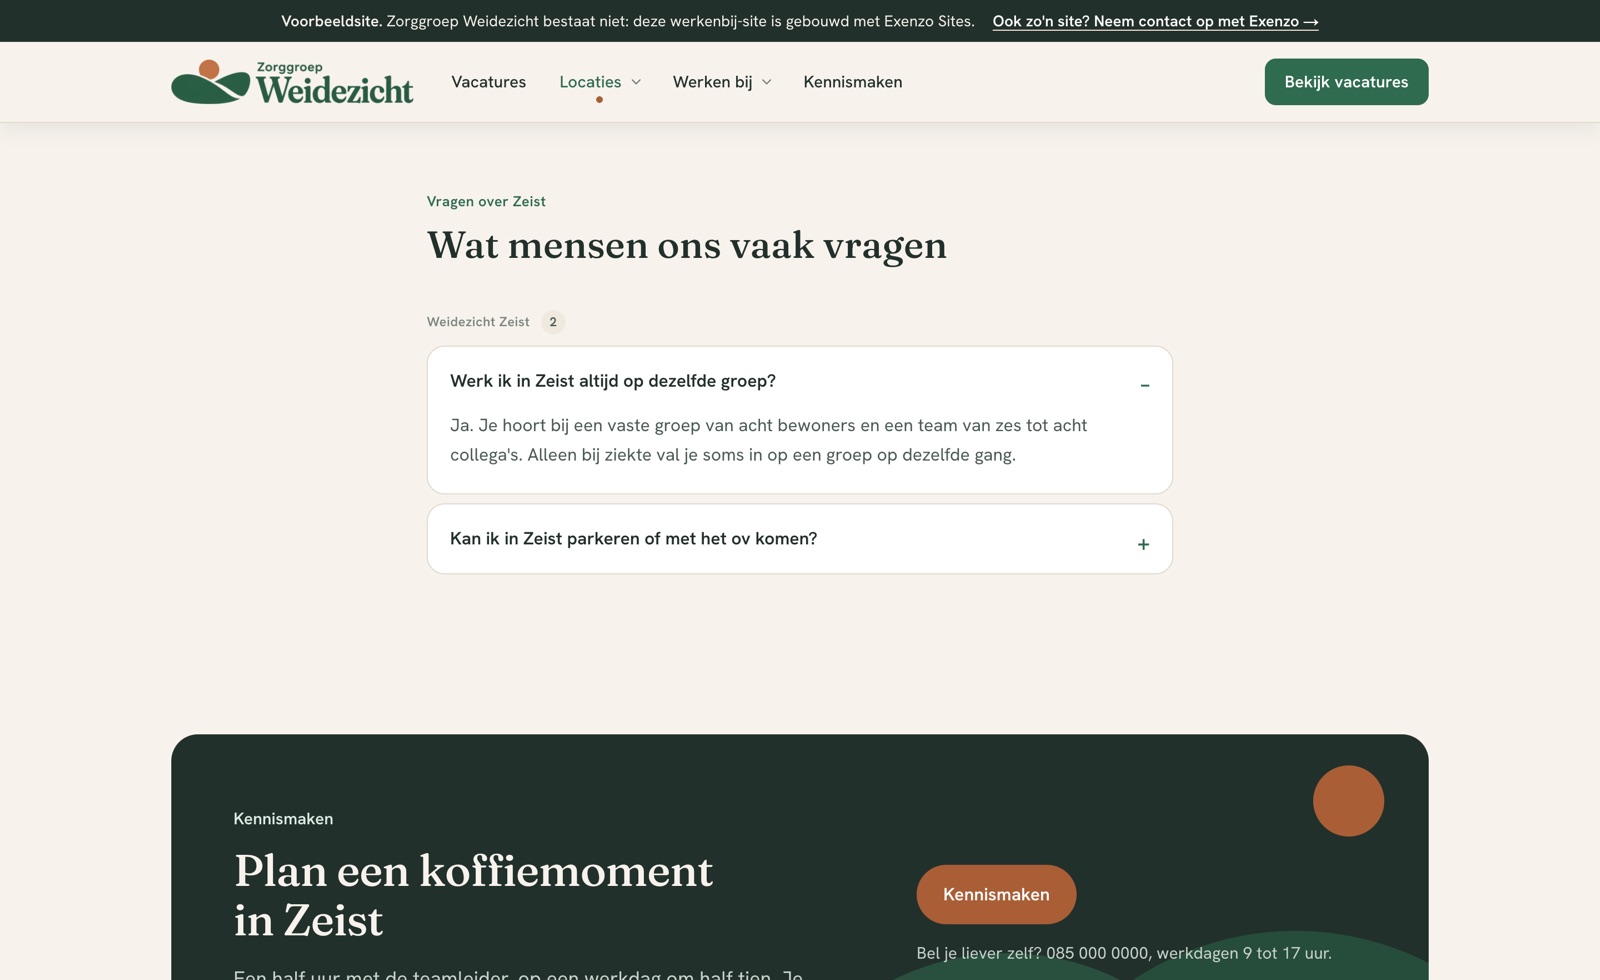 Each location page only shows the questions about that location.
Step 5: get the jobs right
If your jobs come from an ATS, they're already there. If not, the assistant creates them. Check salary, hours, location and closing date for each job, because that's what candidates filter on.
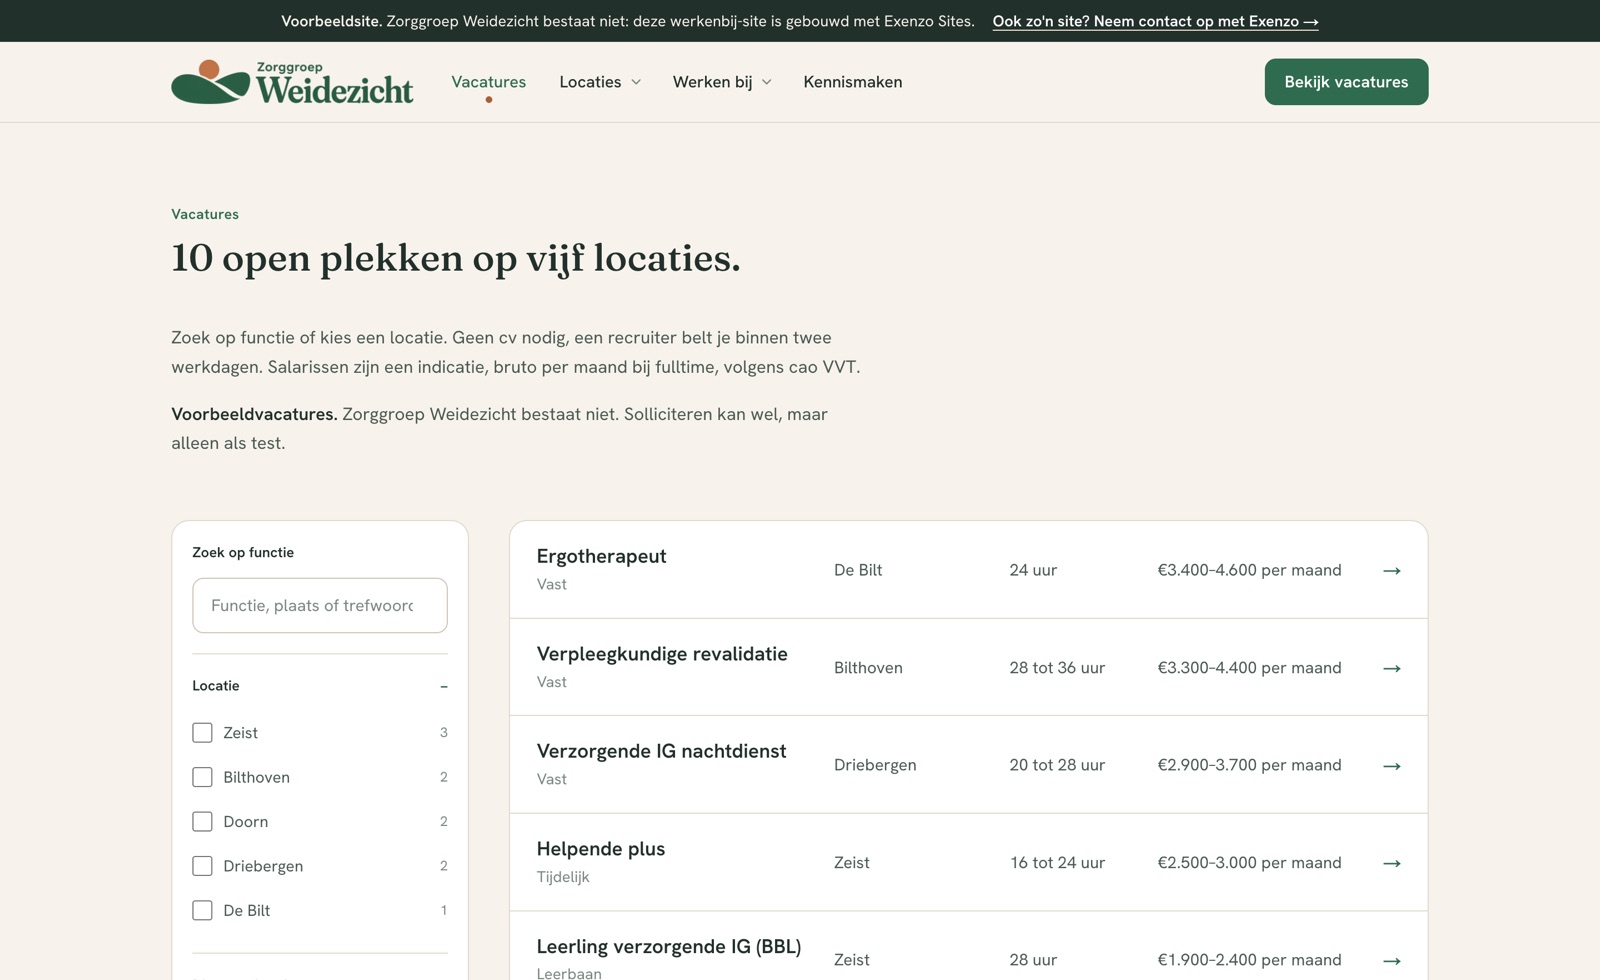 Filters for location, hours and salary are generated from the job data.
Link each job to a contact person from your team members. The job page then shows their photo, phone number and email address, so candidates know who'll be calling.
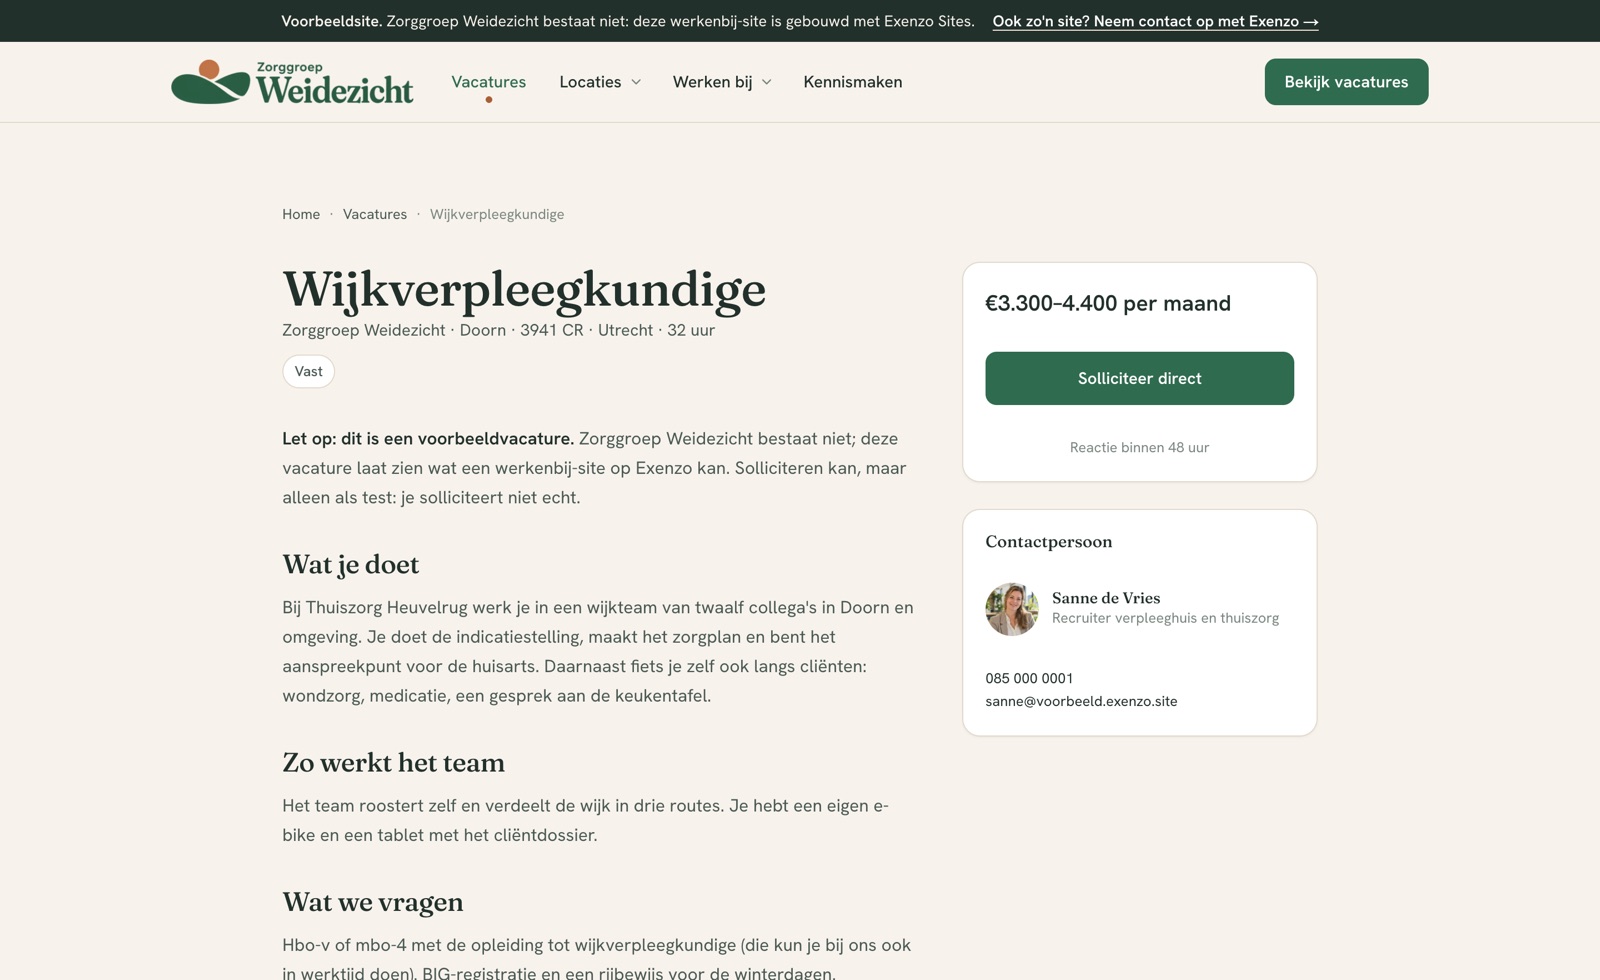 The contact person comes from the team members, not from the job description.
Step 6: add images
Think photos of your locations, portraits next to quotes and a strong photo at the top. Watch the size: a photo at the top of the page needs to be at least 1500 pixels wide, or it looks grainy on a large screen. Check this yourself, because the assistant won't pay attention to it on its own.
Step 7: refine the design, if you want to
The standard blocks look tidy. If you want something more distinctive, like tiles that tilt or a shape that floats, the assistant can write a custom template for each block type. That's available on the Premium plan, and it's where you'll need to review the most.
Step 8: look for yourself
The assistant works with your page's code and doesn't see the result the way a visitor does. A logo with rounded corners or a grainy photo only stands out when you look yourself. So click through the site yourself, on your phone and on a large screen.
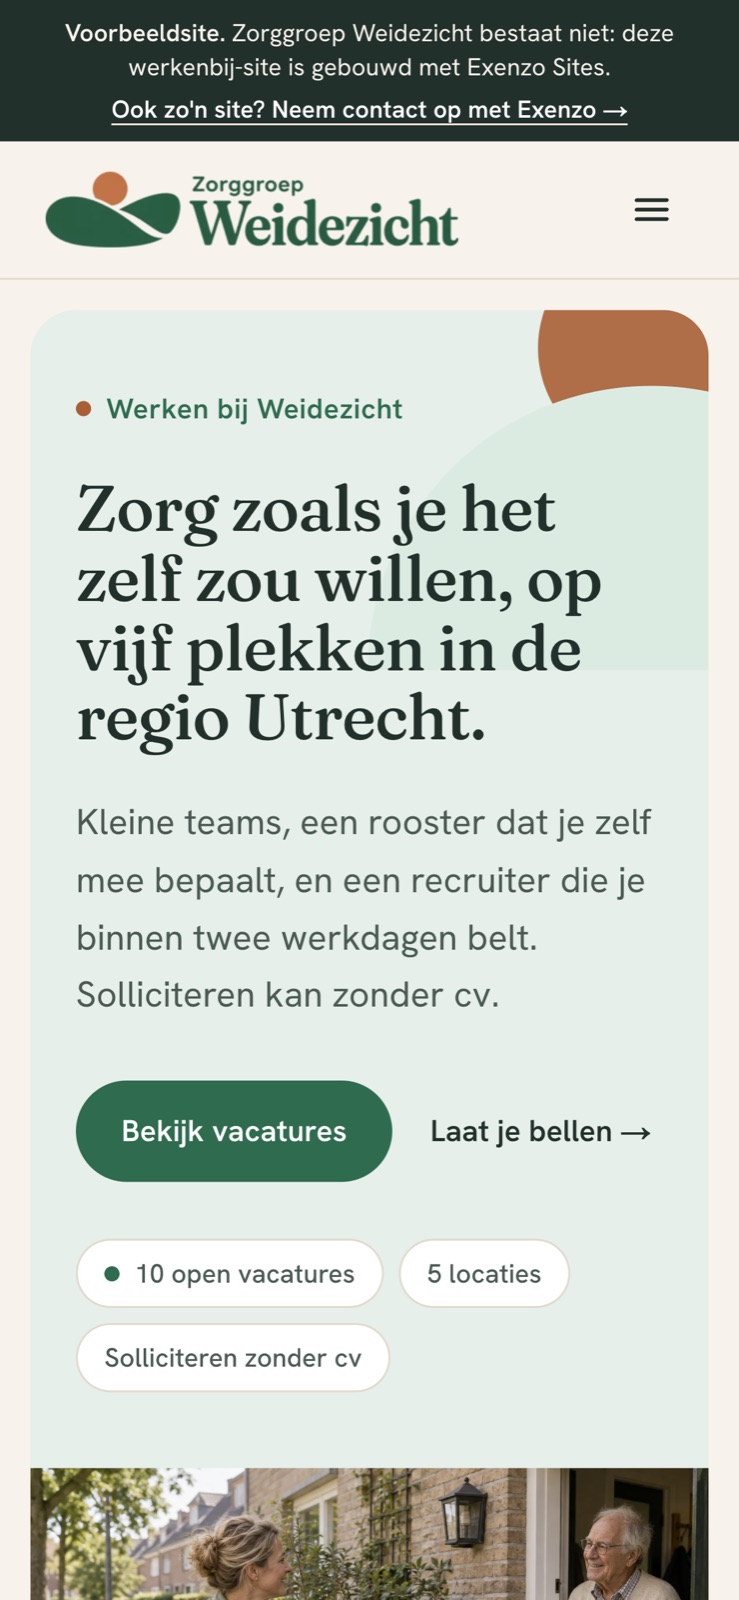 Always check on your phone too: that's where most candidates come in.
What stays your job
Publishing. The assistant prepares everything as a draft. You review it and put it live.
Checking the content. An assistant writes a job ad in a minute. Only you know whether the salary is right and whether that training really happens during working hours.
Being honest about what isn't real. If photos are generated, say so. A quote from an employee who doesn't exist doesn't belong on the site.
Making the decisions. Which fields the application form has, whether you need a cookie banner, where applications end up. The assistant carries it out once you've decided.
When building it yourself isn't the right call
If you hire for one role a year, you don't need a careers site. A good page on your company website is enough.
If you don't have time to review, let us do it. We build and connect the site with the same assistant, and you get a report every month.
Built with the same connection you get
The assistant that built our example site used exactly the connection you'll get. Whatever went wrong during the build, we fixed in the software. Want to see how it works with your own jobs? Book a 30-minute demo.